
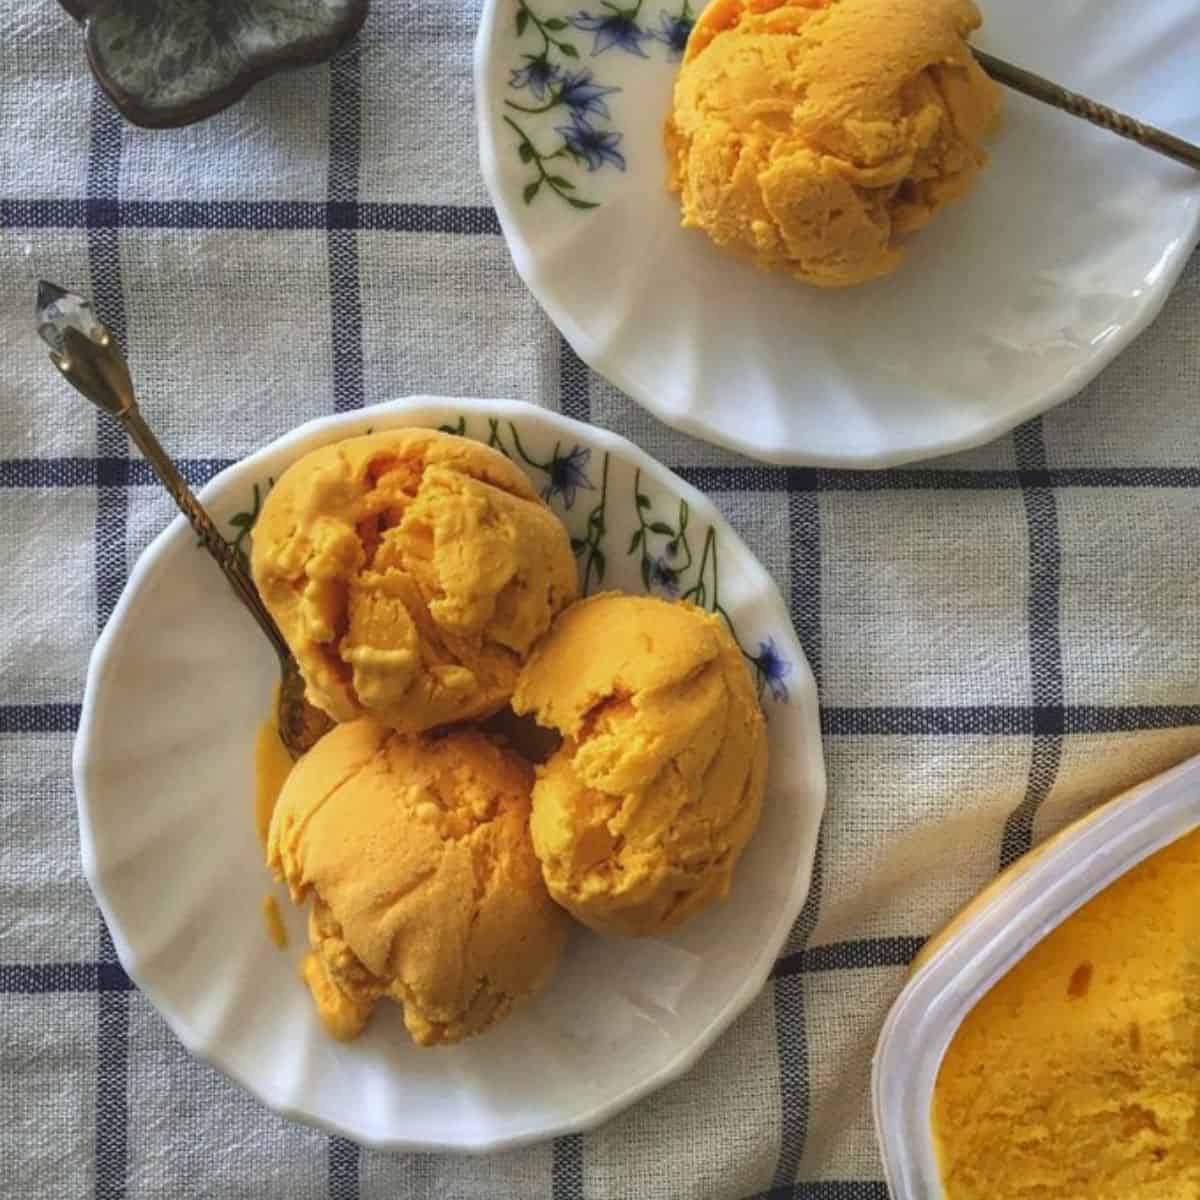
This no-churn, eggless, small batch Pine Nut Ice Cream recipe is a creamy, flavourful treat perfect for those who appreciate the rich, buttery taste of pine nuts in a smooth texture of homemade ice cream.

Homemade ice cream without an ice cream maker flavoured with pine nuts was a sweet success trial. It happened when I wanted to use up the whipping cream and the last bit of condensed milk in the can. Of course, I used the pine nuts with a tad heavy heart- it is not cheap!
Jump to:
📋Why you'll love this recipe?
- Flavour: If you already love pine nuts flavour then you should try it in ice cream version. If this is new, then try it because this is a unique flavour that you wont find easily.
- Recipe: No-churn ice cream recipes are incredibly convenient and require minimal equipment. The process itself is less time-consuming making it a favorite among lazy or busy home cooks.
- No fancy equipment needed: This egg-free, maker-free recipe ensures that everyone can enjoy a delicious bowl of homemade ice cream without compromising on taste or quality.
🥘Ingredient Notes
The recipe quantity is a tiny batch to serve just one or two, so consider this like a taste test batch. If you loved it, then scale up the recipe and make a big batch for a crowd!
- Whipping cream: You can use heavy or whipping cream
- Sweetened condensed milk
- Pine nuts: Choosing good quality pine nuts is crucial for the best flavour. Opt for pine nuts that are stored in airtight pack or containers.
See the recipe card for quantities.
🔪Steps to make pine nut ice cream
- Toast Pine Nuts: Toast the pine nuts on low heat until golden and set them aside to cool. Then use a tiny processor or mortar and pestle to grind them to fine texture.
- Mix the Base: In a large mixing bowl, combine the sweetened condensed milk and ground pine nuts.
- Whip the cream: In another bowl, add the whipping cream and use an electric hand mixer to whisk until stiff peaks form.
- Fold: Gently fold whipped cream into the base mix ensuring they are evenly distributed throughout the mixture.
- Transfer to Container: Pour the mixture into a loaf pan or a freezer-safe container, spreading it out evenly. Place a piece of baking paper or cling wrap touching the surface of the cream. This helps in keeping the ice cream creamy.
- Freeze: Cover the container with plastic wrap or an airtight lid and freeze for at least 4-6 hours, or until firm.
Serve the Pine Nut Ice Cream in chilled bowls or cones. Garnish with a sprinkle of extra toasted pine nuts or a drizzle of chocolate syrup or honey for an added touch of elegance and flavour.
💡Top tips
- Be careful not to overmix the cream and condensed milk, as this can lead to a dense texture.
- Ensure the ice cream is fully covered and placed in the coldest part of the freezer to avoid ice crystals.
- Toasting enhances the flavour, so don't skip this step for the best results.
❄️Storage
I don't think this recipe will have leftovers. But even if you made a big batch, don't forget to place a piece of plastic wrap or parchment paper directly on the surface of the ice cream before sealing the container. And whenever you take it out to serve, keep the remaining in the freezer immediatey.
Equipment
- Pan to toast the pine nuts
- Mixing bowls
- Hand mixer to whip the cream
- Silicone spatula to fold and transfer
- Loaf pan or freezer-safe container to freeze
- baking paper or cling wrap to seal the surface

☝️Frequently Asked Questions
Yes, you can substitute pine nuts with other nuts like almond or cashews or peanuts depending on your preference.
Ensure the mixture is well-covered with plastic wrap and an airtight lid before freezing. Placing it in the coldest part of the freezer also helps.
Absolutely! Feel free to add chocolate chips, dried fruit, or swirls of caramel or fudge for added flavour and texture.
🍲More Pine Nut Related Recipes to Try
Looking for other recipes like this? Try these:


While pine nuts provide a distinct and delicious flavour, you can experiment with other combinations. Try adding chocolate chips, caramel swirls, or a hint of espresso powder for a unique and personalized version of this ice cream.
📖 Recipe Card

Pine Nut Ice Cream (Small batch)
Ingredients
- ½ cup whipping cream, chilled
- ¼ cup sweetened condensed milk
- 2 tablespoon pine nuts
Instructions
Toast the pine nuts
- Toast the pine nuts on low heat until they turn golden, then set them aside to cool. Once cooled, grind the pine nuts to a fine texture using a small food processor or a mortar and pestle.2 tablespoon pine nuts
Mix the base
- In a large mixing bowl, combine the sweetened condensed milk and ground pine nuts.¼ cup sweetened condensed milk
Whip the cream
- In another bowl add the cold whipping cream and use the electric mixer to beat on medium-high speed until stiff peaks form. For about 4 to 5 minutes.½ cup whipping cream chilled
Fold
- Gently fold the whipped cream into the condensed milk and pine nuts mixture until everything is thoroughly combined.
Transfer
- Pour the mixture into a loaf pan or any freezer-safe container, spreading it evenly. Place a piece of baking paper or cling wrap directly on the surface of the mixture to prevent ice crystals from forming, ensuring the ice cream remains creamy
Freeze
- Cover the container with plastic wrap or an airtight lid and freeze for at least 4 to 6 hours, or until firm.
Serve
- Remove from the freezer and let it be on the counter for 2 minutes and use an ice cream scooper or a spoon dipped in warm water to scoop. Serve immediately with a drizzle of chocolate syrup.
Nutrition Info
Nutritional information is an estimate provided for informational purposes only. Values may vary based on ingredient brands, cooking methods, and portion sizes.
Famidha Ashraf says
I might as well bake a batch of brownies and enjoy warm chocolate brownie with cold pine nut ice cream. Are you with me??!