
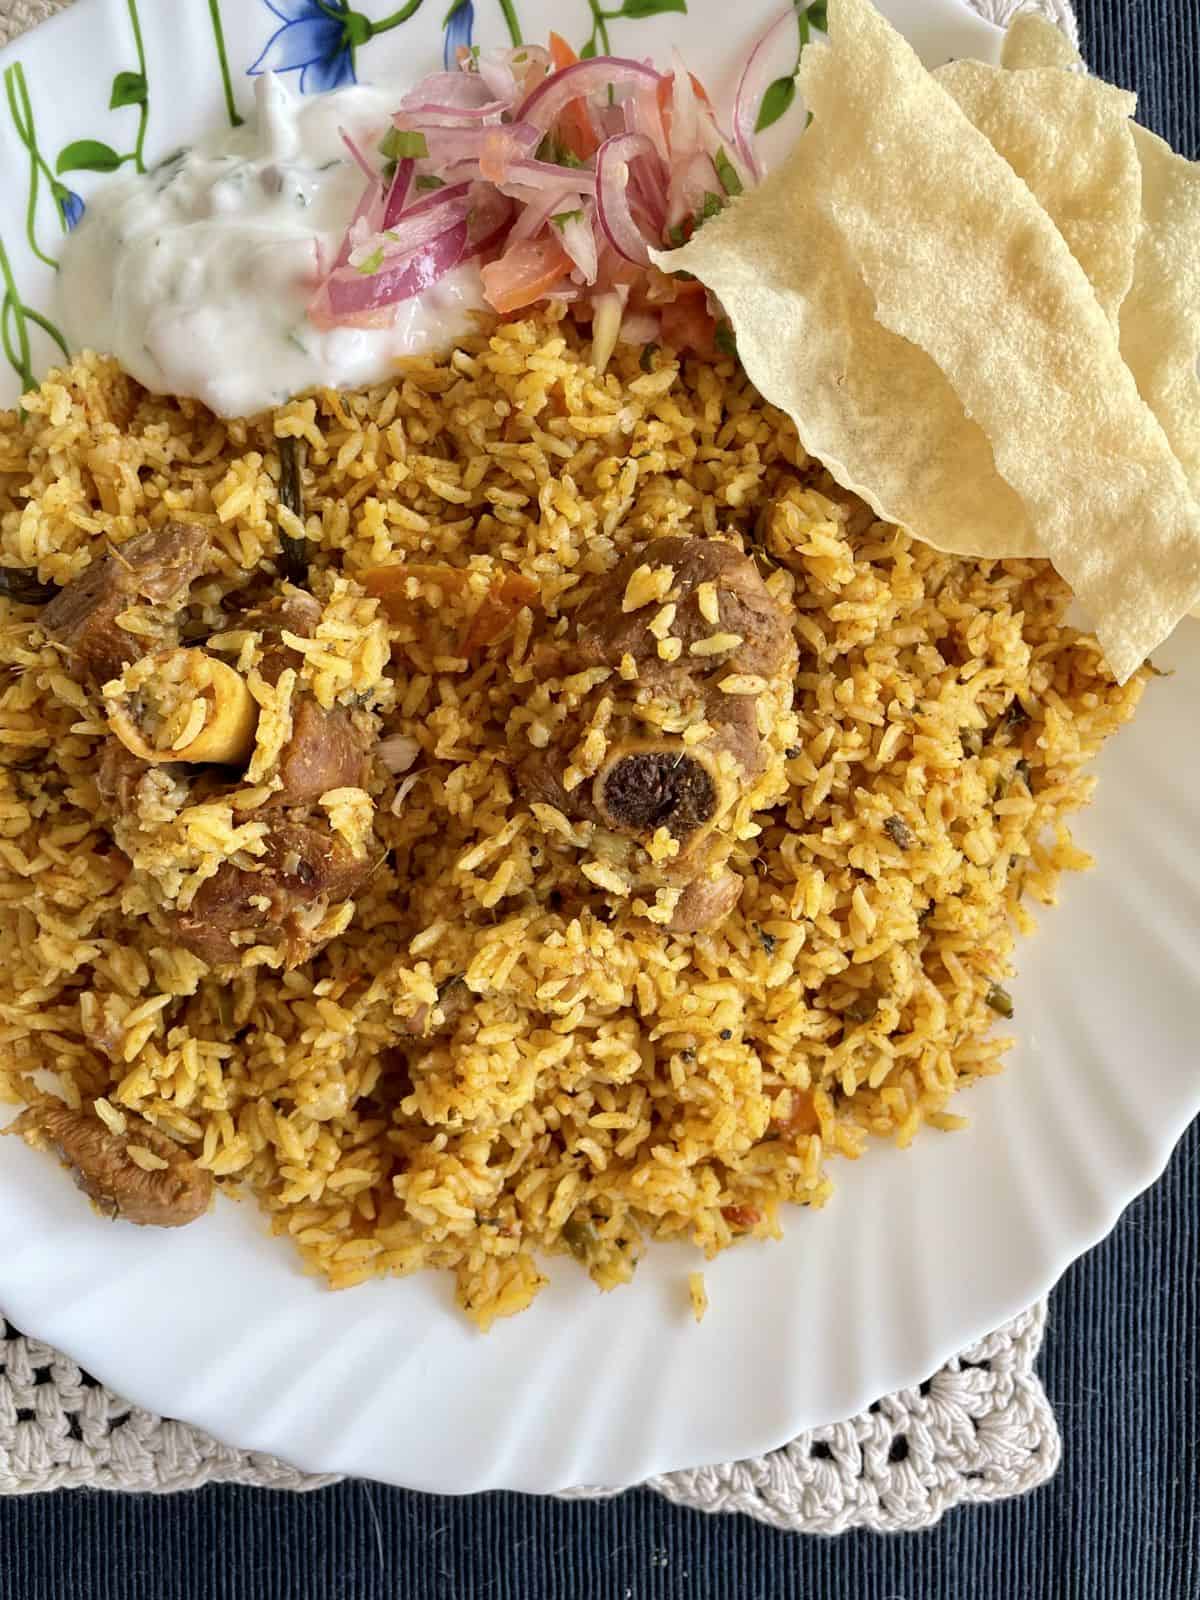
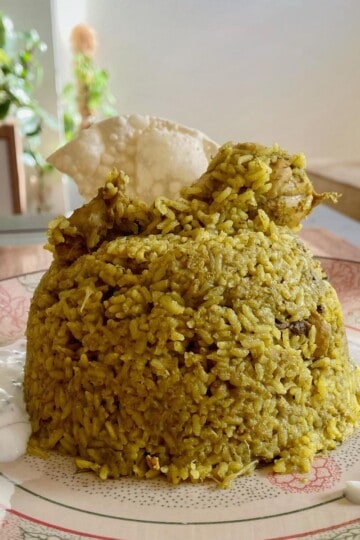
Mutton biryani Tamilnadu style is cooked in a spicy onion-tomato, mint-coriander, and garam masala gravy with ghee-flavoured jeerakasala rice. We love to have this biryani with some cold yoghurt, kachumber and some pappads.

Mummy's adopted biryani
As we grew up in Coimbatore, this is the rice and meat dish of our home that mummy makes on every Eid and now any random weekend too. This pandemic has got us to make special foods on weekdays 😂 This is my mom's way of making mutton biryani Tamilnadu style which she adapted from her bestie (Farhath Akka) who are Tamil/Urdu speaking Muslims. Therefore, this can also be tagged as Bhai Veetu Biryani (Muslim house biryani).
Jump to:
So let me state the fact this is not an authentic recipe. I am not bold enough to call this THE Tamil Nadu biryani because the state has regional biryanis that are different but similar in some notes - like Dindigul biryani, Ambur biryani, Coimbatore Biryani etc.
Supermom
I have watched mom make this biryani on a huge scale to distribute to neighbours and friends on Eid day. She cooked the biryani outside in a huge pot with firewood. She cooked meat on the stovetop. Going back and forth with ingredients and turning the biryani rice with a long ladle was my memory of her being the supermom! My task was to pick mint leaves, chop onions and make the raitha.
Beginner friendly recipe
I have been making this Mutton Biryani Tamilnadu Style since July 2020 and have tried capturing step-by-step pics along with making notes for my benefit. This is not exactly how my mom makes but I decided to document it here as this is a dish very close to my heart and now his favourite too! I have tried my best to share the detailed recipe so you don't make the same mistakes and get it perfect in your first two trials.
This is not Malabar erachi choru. I find the difference in the colour, flavour, spice and taste.
How to make Mutton Biryani Tamilnadu Style?
In simple words, this recipe involves two steps. First, prepare the gravy and then cook the rice with the gravy. That's it. Sounds like Yakhni pulao or erachi chor? Yes, but even more flavourful!
I add the gravy to the rice and then add water to make up for the liquid. Some recipes I found start the gravy with whole spices and ask you to add the rice into the gravy and finish off. But I like my mom's method of starting the rice in ghee and spices and frying the rice for a minute that gives me control or maybe it is a comfort thing.
How to cook the mutton gravy?
Mummy does not make any special garam masala mix though she mentioned that Farhath Akka does. She figured out the spices and added them along with our homemade garam masala which is fennel seeds rich. So make a batch of this garam masala before attempting my recipe. You won't regret it as you can use it for so many other recipes on my blog or any Malabari recipe!
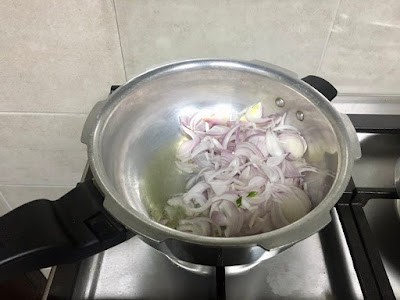
Heat ghee and oil in a pressure cooker and add the thinly sliced onion along with a small piece of kalpasi if you have it (she never used but you know my love for it). Saute this on medium flame until it starts browning.
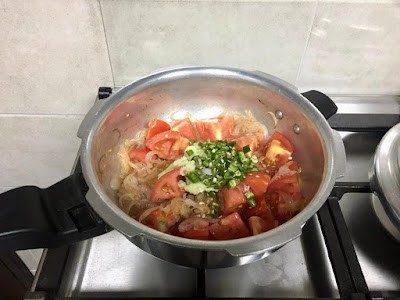
Mom makes a paste of ginger-garlic chillies but I just add finely chopped green chillies and homemade ginger garlic paste. Saute the ginger garlic green chillies, tomatoes, mint and coriander leaves.
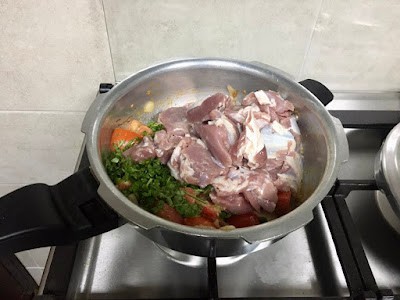
Add the washed and drained mutton pieces and salt.
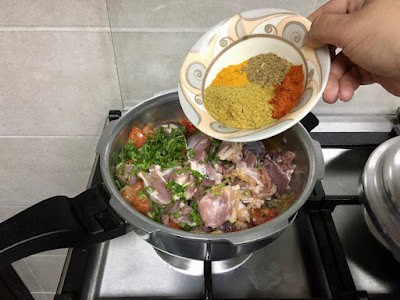
Add all of the spice powders and cook this until the meat starts to release moisture.
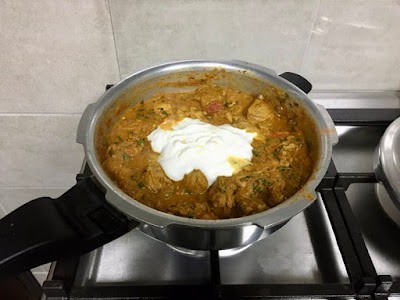
Stir in the whisked yoghurt and water.
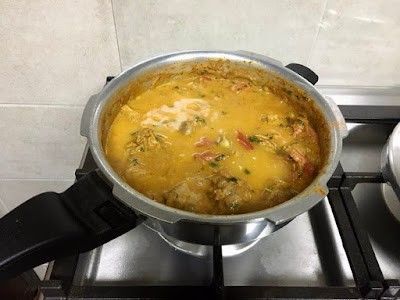
Pressure cook on a medium flame for 20 minutes or until meat is cooked through.
How to cook the rice for biryani?
Use jeeraka samba or jeerakasala rice if possible but you may use basmati.
Note: You may cook the gravy, add the rice and water and cook to finish all in one pot itself. I have not tried this method yet.
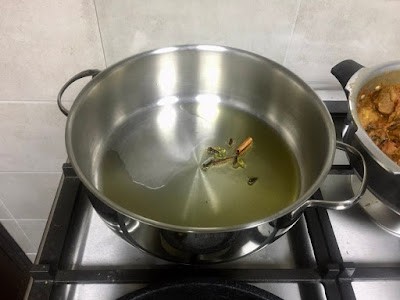
Heat ghee in a nonstick pot if you are a beginner or stainless steel pot. Fry the whole spices until fragrant.
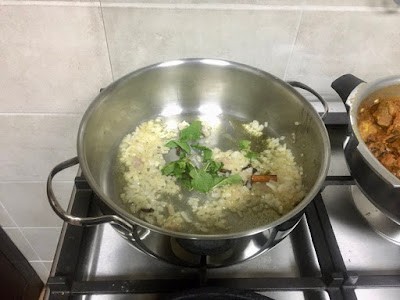
Add diced onion and saute until translucent. Add a few fresh mints leaves too.
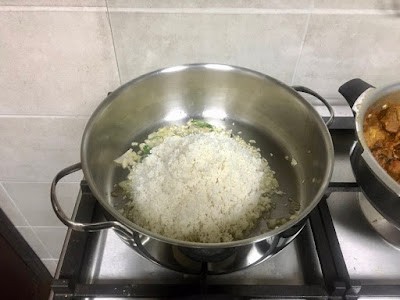
Add the washed and well drained rice.
Fry the rice for a couple of minutes. Meanwhile, make sure your mutton gravy is warmed up.
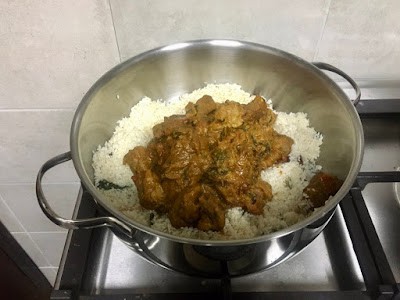
add the hot mutton gravy
Mix it with the rice and keep hot water ready to add.

Add enough hot water along with salt and lime juice. Make sure water covers the rice by an inch. You can always add more later so start with less than what you gauged.
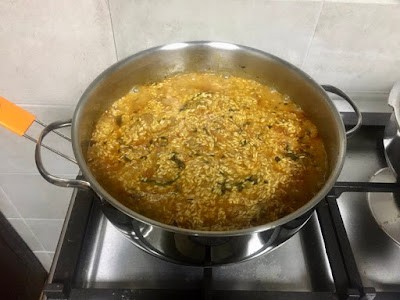
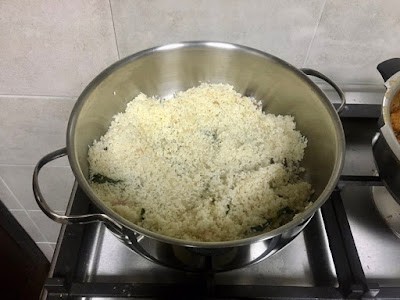
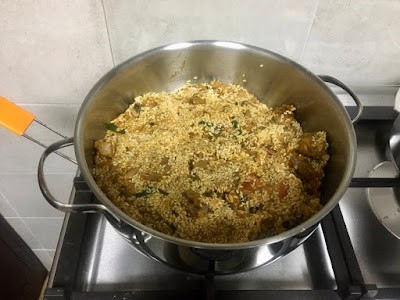
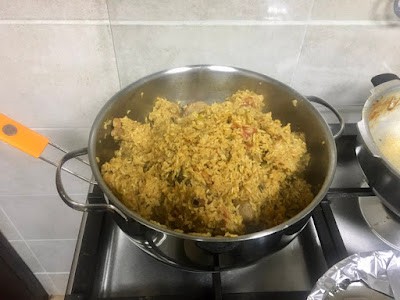
Cook on high flame until the grains surface up.
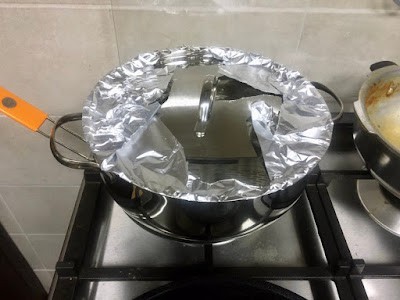
Reduce the flame to the lowest, and slide a heat diffuser pan underneath. Use a spatula to dig and bring the bottom portion of rice to the top. Cover tightly and cook for 30 minutes.
Make sure to dig and flip the rice one more time during the 30 mins.
If you see the grains are raw (white dots), then add a splash of hot water and continue to steam cook covered. It is always better to add less water and keep adding more when required than you add more and end up with mushy biryani. Beginner-friendly idea.
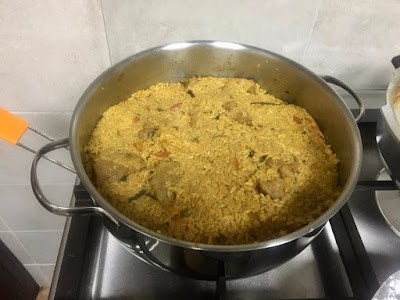
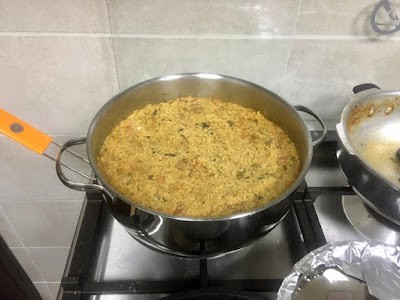
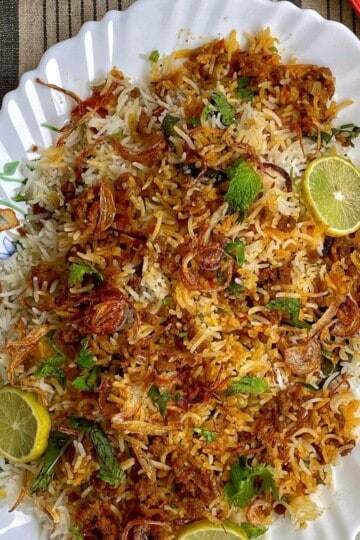
Mutton biryani Tamil Nadu style is ready to serve.
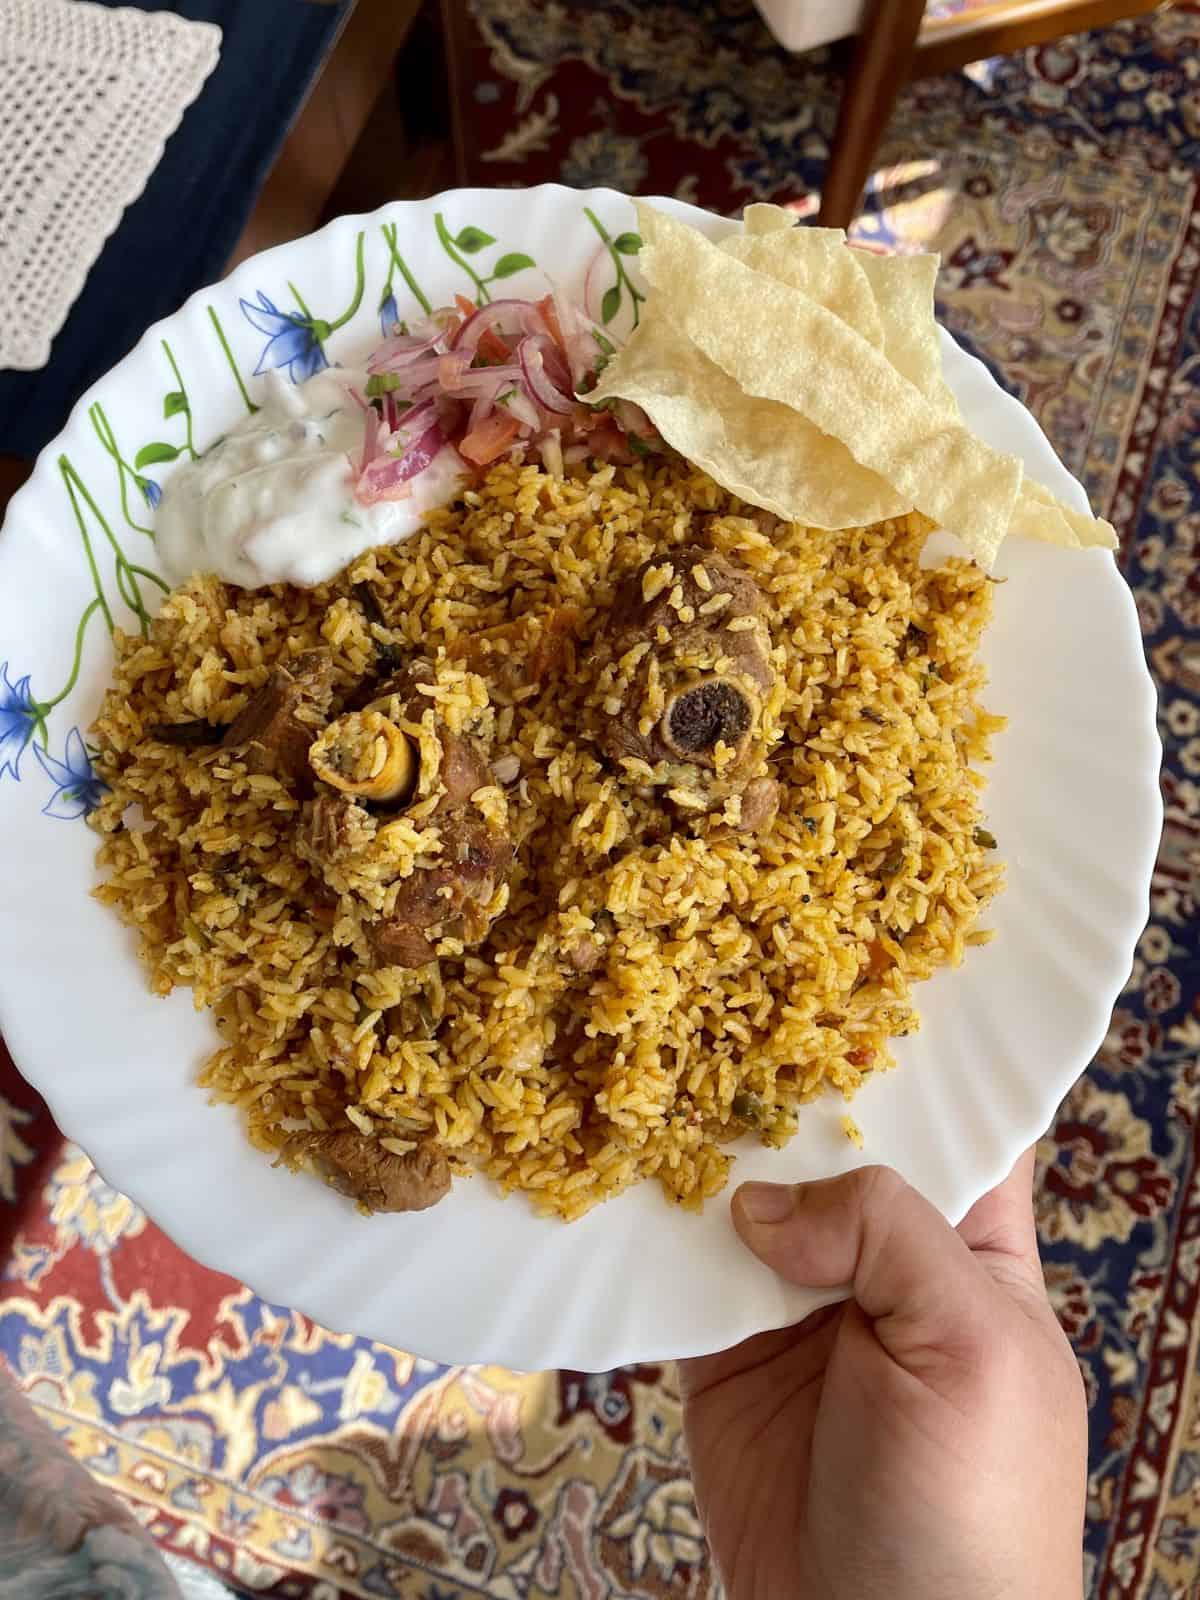
Serve hot with cold yoghurt raitha or onion tomato kachumber and some pappads.
📖 Recipe Card
Mummy's Tamilnadu Style Mutton Biryani
Ingredients
For the Gravy
- 1 tablespoon ghee
- 1 tablespoon cooking oil
- 1 piece black stone flower, kalpasi (optional)
- 1 large onion, sliced thinly
- 8 to 10 green chillies
- 1½ tablespoon ginger-garlic paste
- ½ cup fresh mint leaves
- ½ cup Fresh coriander leaves, chopped
- 2 large tomato, chopped roughly
- 500 grams mutton, bone or boneless washed and drained completely
- 1 tablespoon red chilli powder, you can reduce this to 2 tsp
- 2 tablespoon coriander powder
- ½ teaspoon turmeric powder
- 2 teaspoons garam masala, use my Malabar garam masala
- 3 tablespoons curd, whisked
- ½ cup water
- Salt to taste
For the Rice
- 2 tablespoon ghee
- 3 green cardamom
- 5 cloves
- 1 inch cinnamon stick
- 1 medium onion, diced
- 1½ cup Jeerakasala or Kaima rice, washed and drained (use jeeraka samba if you have that but adjust water accordingly)
- water, cook the rice*
- Juice of half a lime
- salt to taste
Instructions
Prepare the gravy
- Heat ghee and oil in a pressure cooker.1 tablespoon ghee1 tablespoon cooking oil
- Add a piece of kalpasi (optional)1 piece black stone flower kalpasi (optional)
- Saute the onions until starting to brown.1 large onion sliced thinly
- Add the ginger-garlic paste, green chillies, mint and coriander leaves and saute for a minute.8 to 10 green chillies1½ tablespoon ginger-garlic paste½ cup fresh mint leaves½ cup Fresh coriander leaves chopped
- Add the tomatoes, drained meat, salt and all the spice powders and cook until moisture starts to release.2 large tomato chopped roughly500 grams mutton bone or boneless washed and drained completely1 tablespoon red chilli powder you can reduce this to 2 tsp2 tablespoon coriander powder½ teaspoon turmeric powder2 teaspoons garam masala use my Malabar garam masala
- Stir in whisked curd and water.3 tablespoons curd whisked½ cup waterSalt to taste
- Pressure cook for 20 minutes on medium flame or until the meat is cooked.
Prepare the biryani rice
- Take a deep pot (nonstick is better) that can hold the biryani and heat ghee on medium flame.2 tablespoon ghee
- Fry the whole spices until fragrant.3 green cardamom5 cloves1 inch cinnamon stick
- Add and saute the chopped onions and mint leaves.1 medium onion diced
- Add the drained rice and toast them by stirring for a minute.1½ cup Jeerakasala or Kaima rice washed and drained (use jeeraka samba if you have that but adjust water accordingly)
- Dump the prepared gravy and carefully fold it into the rice.
- Add enough very hot water to the rice so that there is at least an inch of water above the rice. (In all my attempts, I have added a total of 2¾ cups of water approximately for 1½ cup rice - first 2½ and then ¼ cup water. But please adjust as per the liquid in your gravy)water cook the rice*
- Taste and adjust the salt and add lime juice as per taste.Juice of half a limesalt to taste
- Bring this to a full boil and cook until you can see grains surface on top and liquid is absorbed.
- Reduce the flame to the lowest, and slide a flat pan or heat diffuser underneath.
- Use a flat spatula and carefully dig and bring the bottom rice to the top. If you see the grains are too raw and dry, then add a splash of water, cover with foil or cloth and then the tight lid.
- Let the rice steam cook for 15 to 20 mins but make sure to flip the rice in between at least once.
- Switch off, open and scoop to transfer to a serving plate and serve warm with yoghurt, salad and pappadums.
Notes
Nutrition Info
Nutritional information is an estimate provided for informational purposes only. Values may vary based on ingredient brands, cooking methods, and portion sizes.


Famidha Ashraf says
I love this mutton biryani recipe, Tamil Nadu style, for its bold spices, aroma, and tender meat that melts into the aromatic rice. It’s comforting, deeply flavourful and truly unforgettable. I can’t wait to hear how yours turns out!